Blu-ray Ripping

I still buy Blu-rays as it’s the best quality you can get today, especially compared with streaming services that always over compress. I also like to own my media and not rely on Netflix or Amazon keeping a film available on their service. One thing that still irritates though are the forced adverts, crappy menu’s and general slowness when booting up a Blu-ray film. Ripping a Blu-ray is fairly straightforward now but a little more awkward on Mac’s as Apple has never shipped a Mac with a Blu-ray drive. So a few weeks ago I picked up a CD/DVD/Blu-ray drive that works over USB so I can rip my disks.

There are a number of different guides online on how to rip Blu-rays on the Mac but the one I recommend is from Jason Snell – How I rip DVDs and Blu-rays. The software I use is:

Snell’s guide shows how to setup Handbrake to use MakeMKV to read Blu-ray’s but I prefer a two step process. I firstly extract the Blu-ray to the Mac’s hard drive via MakeMKV and then within Handbrake I convert to a more suitable format for storing longterm on the NAS.

Currently I store as MKV’s and use the H.264 video codec. You can see the other settings I choose in Handbrake below. I’ve found keeping framerate constant delivers better results, Quality I set to RF 18, Tune to film, Profile to high and Level to 4.1. I also set the Preset to veryslow which means the conversion process takes longer but you get slightly smaller file sizes.

HandBrake video

HandBrake audio

Handbrake picture

For audio I select Auto Passthru rather than encoding as something different and in the Picture settings I turn off any cropping settings and set Anamorphic to none. Handbrake will take some time to encode a film so I generally run a couple of encodes overnight as a batch or while I’m at work and it’s generally the only time my iMac fans kick in as Handbrake will use all the CPU available.

Plex

What I’m left with is a great quality MKV that I watch via Plex. Inspired by a recent tweet my Marvel movies have never looked better. Over the next few weeks I’ll look at H.265 to see if it offers a better long term storage format but for now if you want to watch your Blu-ray without the hassle of piracy warnings, menu’s and forced trailers I’d recommend MakeMKV, Handbrake and Plex.

BB-8

A couple of months back I bought a Sphero BB-8. When I saw the video of it I just couldn’t resist…despite it being £130. Ouch.

When I got it the first thing that struck me was it was much smaller than I had thought – the size of a small orange…or a large tangerine. Like most things nowadays I had to do a firmware update on first use which took a couple of minutes (unlike most games which need a download or two to get working….Forza 6 and it’s 60 GB download on Boxing Day is the worst yet) but once that was done I was good to go.

The app allows you to steer BB-8 and it was much more controllable than I thought it would be. It was easy to steer around but also easy to steer into walls 🙂 When you do collide with something BB-8 would glow red, spin a bit and make a groaning droid noise. What’s a shame is that the video makes it look like the noise comes from BB-8 itself but they are all generated from the iOS app. You can get BB-8 to do pre-programmed paths – in a circle, square, spin, panic and run etc. The app is also voice activated so you can say “BB-8” and the app will then listen to your voice commands like “Go Explore”, “Go To Sleep” or “It’s a Trap” which is my favourite.

There is a message mode which lets you see holograms but this are displayed on the phone and you can record your own but this is a bit weak. You can also send BB-8 on patrol and he will merrily wander around your home or office while you work away. Neat. This is all done over bluetooth and the range is pretty impressive. Battery life is around an hour for three hours of charging which is also pretty good as you tend to get a bit bored with it before the battery ever runs down.

While there have been frequent app and firmware updates to add features I’m sure that for Star Wars Episode VIII we’ll see a new version which will have better hardware and maybe feature things like in built sound and a camera. Something to make it more feature rich than the current version.

Then I saw this tweet a couple of days ago:

Mind blown.

Tickle is an app for iOS that allows you to easily build programs for a variety of smart devices. To program BB-8 you select a template, connect to it from Tickle and then you can drag and drop a variety of commands to give you a lot more control over BB-8 than the official Sphero app.

IMG_0402

You can set the colour of BB-8 to almost anything, set it on a variety of paths and loops but also detect events. So if BB-8 collides you can make it shake, change colour, reverse – whatever you want. You can also detect events from the iOS device so depending on how it is tilted or if it’s shaken you can make BB-8 do different things. This is a great extension of what the BB-8 device can do and it’s opened up another avenue that I hadn’t considered.

Digging deeper I found this post on medium – Sphero BB8 robot toy — The Missing Manual. Really useful advice for any current or prospective BB-8 owner with links to a couple of Javascript libraries that allow you to hack BB-8 even more.

Overall I like the Sphero BB-8 but it’s hard to recommend at the price given what it can do although with the Tickle app it’s clear there’s a lot more to this droid than meets the eye and I’m pleased I picked one up.

The Phantom Zone

Since I was a kid I always wanted a radio controlled plane or helicopter. In fact it was always a helicopter thanks to Airwolf. Over the last four or five years as drones have quite literally taken off as a consumer product I’ve came close to buying one as the technology and ease of use has matured and the price dropped to more reasonable levels. What put me off was buying the drone was always just a part of the full solution. Next was a GoPro, then a gimbal…and then connections to iPhones/iPads for your remote. The list went on and it all felt a bit of a faff when I just want a drone and I can go out and fly.

Then Paul posted a video.

The Phantom 3 he purchased seemed to offered all I wanted…so a couple of weeks later I ordered mine. Yes – I have a drone. Arrest me now!

phantom_large

I picked up the DJI Phantom 3 Professional whose main difference with the Advanced is that it will record video in 4k. Out the box the Phantom needs quite a bit of setup. Firstly you need to charge the battery and the remote control. This takes a couple of hours. Whats nice is the remote control can now use an iOS or Android device to act as a screen which will receive live video from the drone. When I priced up the Phantom 2 you needed the drone, a light bridge plus camera but the Phantom 3 has all this built in. So I fired up the drone and the remote control and launched the DJI Go app…which complained that I needed to update the drone firmware and the firmware on the remote. Damn – another hour.

So out the box the drone can take a bit to setup and there isn’t much in the way of documentation. The full manual isn’t included but can be downloaded from the DJI website. More useful was this Phantom 3 Checklist from The Phantom Guide.

With the firmware updates done and an IMU, gimbal and controller calibration completed too I was ready to fly.

First Flight
I was a bit nervous about flying the Phantom for the first time but I needn’t have worried. The Phantom has three flying modes – P, A and F. P-Mode is the default which is positioning mode. This mode will use GPS and the built in vision system (downward pointing camera and infrared sensors) to help maintain position and makes for far easier flying.

I went out very early so I could fly without disruption and also make the most of a good weather forecast. Movement was a bit more rapid and jerky but not too bad for the first time.

You start in beginner mode which restricts you to 30m but I switched that to 120m and….oh boy. The views were fantastic and I was really spoiled for a first go as the weather was perfect.

Glasgow University

Glasgow

The photo’s out of the Phantoms built in camera are excellent and only needed some slight tweaking in Lightroom. I was also impressed with the video. The Phantom + gimbal give incredibly steady video and with some practice in controlling with a steadier hand it should lead to some excellent footage.

I did throw the drone around during these first flights. It moves pretty fast but the movement is predictable so as long as I take some care I should be ok. Landing was also easier than expected probably thanks to the mode I was in. The DJI app has a button to automatically take off and land but I prefer to do that myself. There’s also a return to home button if you lose sight of the drone or the drone loses contact with you. I’ve not had need to use this yet but it’s great that the feature is there.

What did take me by surprise was how quickly it rose. It was easy to lose sight of the drone especially in the bright morning sky. The live feedback from the camera worked well and I didn’t have any issues with the drone going out of range but I wasn’t pushing it on this first go. The app is much better than I expected. You have full control over the camera settings just like a typical hand held camera. You also not only get a live view from the camera but a map showing you and your drones position. After you’ve finished there are full flight logs showing where you were, the photo’s you took and also the control inputs during the flight. Impressive.

QEC
The following day the QEC block was to be barged down the Clyde. With another good day forecast it was a great opportunity to record the event via the drone.

I really wanted to swoop by the block as it passed and spin in front of it but I crapped myself. What if I hit it? What if I lost control. Second day nerves but head ruled the heart on that one.

QEC

There was also a few more people around despite the area I picked being really quiet. Around half the passers by asked about the drone, what it cost, what happens if it falls in the water (obvious really?) and a couple stayed to watch me take off and take some pics. No one was negative about it which was pretty cool.

Accessories
As with all new gadgets you always have a need for accessories. The must have for the Phantom is a battery. It comes with one but that gives you a maximum flight time of 25 minutes, more likely 20. However a spare battery doesn’t come cheap – £124 for one extra battery. Ouch. When I picked up the Phantom 3 I went for a package which included an extra battery, extra charger, spare props and landing gear, larger SD card and a bag for carrying the drone. Overall the package saved me around £200 and the battery and extra charger are really useful – charging can take quite a while so being able to charge the two batteries at the same time is great. Over time I can see me picking up at least one other battery but the two are fine for now.

There’s a massive aftermarket for the Phantom drones and I’ve picked up a couple of extras to protect the camera and gimbal. The supplied gimbal protector is a bit of a faff to fit and doesn’t protect the lens. So I picked up a 3D printed gimbal holder and lens cover which fits a lot better. I also picked up a gimbal guard which attaches to the drone and should protect the gimbal which looks pretty fragile when landing. Probably a bit OTT but piece of mind is no bad thing.

Apart from the battery I’ve got my eye on another couple of accessories. The iPad screen is almost unreadable on a bright day so I was running for shade a few times. I’ll pick up a sun shade at some point although it’s not an immediate need. I’ll also look at getting an ND filter or two for the camera especially for those dawn and dusk shots.

For Your Consideration
I’m thrilled with the Phantom so far but there are a few things to think about if you are interested in buying one. I went for the Professional but the Advanced would have done fine as the 4k video is really a nice to have. It also makes for much longer video editing and large files. The quality is stunning though. Video editing is also something new to me. For photo’s I love Lightroom and know how to get the best out of it but for video’s I’m a bit lost. New skills ahead!

The main consideration is flying legally. When flying in the UK you need to keep the CAA rules in mind. You don’t need a licence to fly a drone if you are doing non commercial work but when you see the speed and power in the Phantom I can see there being a call for all users to be trained/licensed in some way. Two main points are keep under 400ft (120m) and keep 50m away from people and buildings…which is actually quite difficult to do.

One last point is that this is an expensive hobby. The drone itself costs a fair bit (£1200) plus the accessories but there is also the knowledge that at some point an engine, rotor or worse the camera/gimbal will be damaged or need repairing/replaced. None of the main parts are cheap so have that in mind when buying a Phantom.

Fun!
I can’t finish this write up on a negative though. The Phantom 3 is a great piece of kit and it’s so much fun to pilot. I’ve loved the outings with it so far and the images and video’s have exceeded my expectations.

I’ve got a list of places that I want to visit over the coming months but I’ll bide my time as I want to try and get the right weather conditions for some of them. However I’ll be getting the drone out again even just to fly around and practice. I’m also looking forward to upcoming software updates that will allow you to pick a point of interest and the drone will focus on it as you fly around and also the ability to set waypoints so you can pre plan flights.

I can’t wait.

Cloud Cover

The cloud. All our data should be in it. It makes backup easy. It makes your life simpler as it’s one less thing to manage. But are you in control? It sometimes screws up. Who should you trust your data to? This is all Apple Music’s fault. It’s not really but it did get me thinking about how I manage my data especially as it only ever grows.

Data has been a problem for me for quite a while. I bought a Drobo back in 2009 which wasn’t one of my smarter buys. Proprietary drive format and also hit a nasty update bug upgrading from Leopard (I think) which meant the drive was toast until it was reformatted. Not what you want from a storage/backup device. Since then I’ve relied on internal iMac storage and a 3TB Firewire drive and shuffle data around other older drives. I looked at Thunderbolt but was never convinced about longevity of the format and the price was always way more than USB equivalents. Also my current Mac’s are USB2 only which make for slow access compared to Firewire and USB3…and I didn’t want to buy another Firewire drive as that technology is dying.

That left NAS and Cloud. I had a 2 bay drive a few years ago but was frustrated by fan noise and slow performance. It was also relatively expensive to setup a NAS solution. However when looking at Cloud options I have 2 main misgivings. Firstly is the lack of control of my data. Ultimately I’m in someone else’s hands when accessing my data. Secondly, it doesn’t always work. Also, Cloud has been trumped up as some miracle solution…it’s just off-prem storage and services. Although I do use quite a few Cloud services I can’t rely on them and they are used as fallbacks. I want my data local and I want to be in control of it with options to back up the data to the Cloud via a variety of services. So NAS it is.

The NAS would be primarily a home for my photo’s and video’s and also my movie and music collections as well as documents, software and other media. I also wanted the option of running a variety of software packages at various times of the day (mini server) and it would also be the home for my Mac backups.
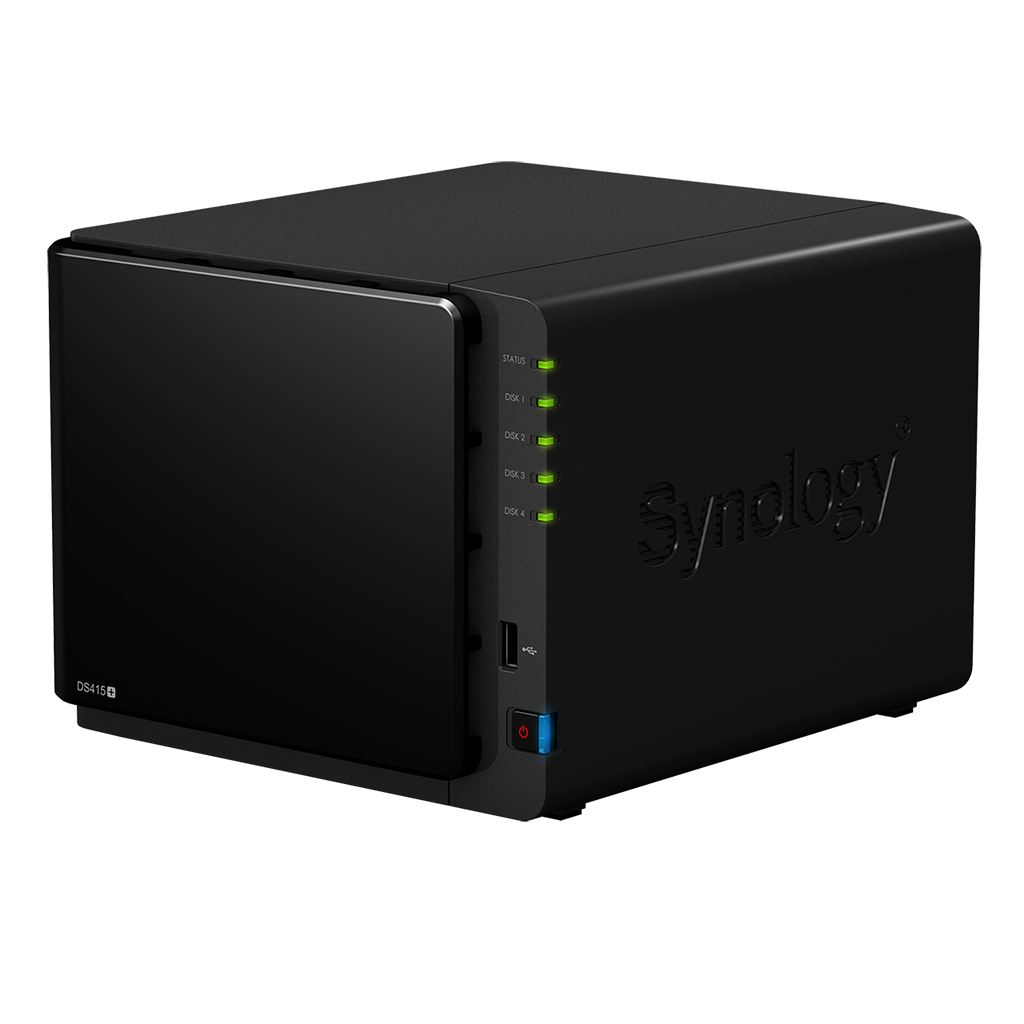
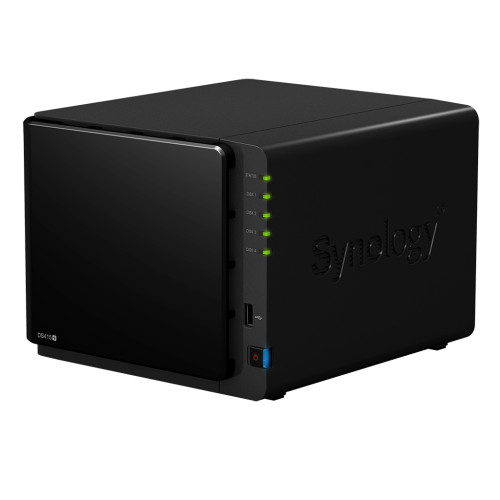
Synology 415+
I looked at a variety of vendors but kept coming back to Synology mostly down to the large community, great software options and hardware which generally gets favourable reviews. After looking at a couple of options I settled on the Synology 415+. It has a couple of USB3 ports although the easily accessible port at the front of the NAS is USB2 only. It also has dual network ports and although theoretically you can bind them in practice it does’t yield much benefit. It’s also an Intel chipset which I was keen to get and has built in encryption so if I do encrypt some of my data it won’t kill the CPU.

415

Next decision was how much storage to add. The 415+ is a 4 bay NAS and while I could have plumped for a couple of drives to get me going I wanted to get four in and give myself plenty of growth headroom. Drive prices have settled down again so I ended up going for 4 x 4TB Western Digital Red HDD’s. This would give me 16TB of storage which I would configure as Raid 5 so giving me around 12TB or so of usable disk while giving me the redundancy I was looking for – one drive could fail and I wouldn’t lose any data.

The 415+ is quite compact for a 4 bay NAS but this is down to the large external power brick that comes with it. Installation of the drives is very easy. Pop open the cover, lift a tab and slide out a drive mount. The 415+ doesn’t need screws for the drives, instead using plastic guides that click into place where the screws usually go. A nice touch is that the guides also have rubber grommets which should help to cut down on vibration. You then slide the drive mount back in. Do that another three times, plug in a network cable and power and you are good to go.

A couple of other hardware thoughts. Fan noise is always a bugbear for me but it’s not a big issue with the 415+. You know it’s on but it does a good job of keeping get drives and NAS cool without being overly distracting. The fans are also always running (at a slow speed) unless you switch of the NAS. It’s also all plastic although looks good with the logo’s either side doubling as air vents. It won’t win any design awards but it’s good enough.

Setup
When you first switch on you’ve a couple of options. You can install the Synology Assistant software on your Mac/PC or visit find.synology.com from your browser. This finds the NAS on your local network and starts the setup process. First steps are to create an admin account and download the latest version of DSM – Diskstation Manager. You then format and create a volume and are good to go. From out the box to disk available took less than 30 minutes.

dsm desktop

control panel

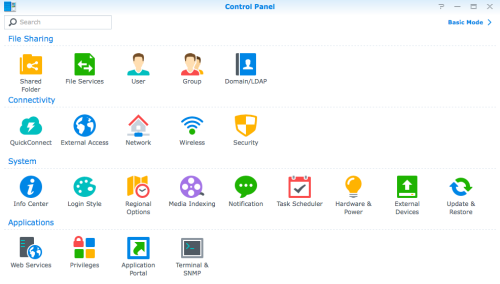
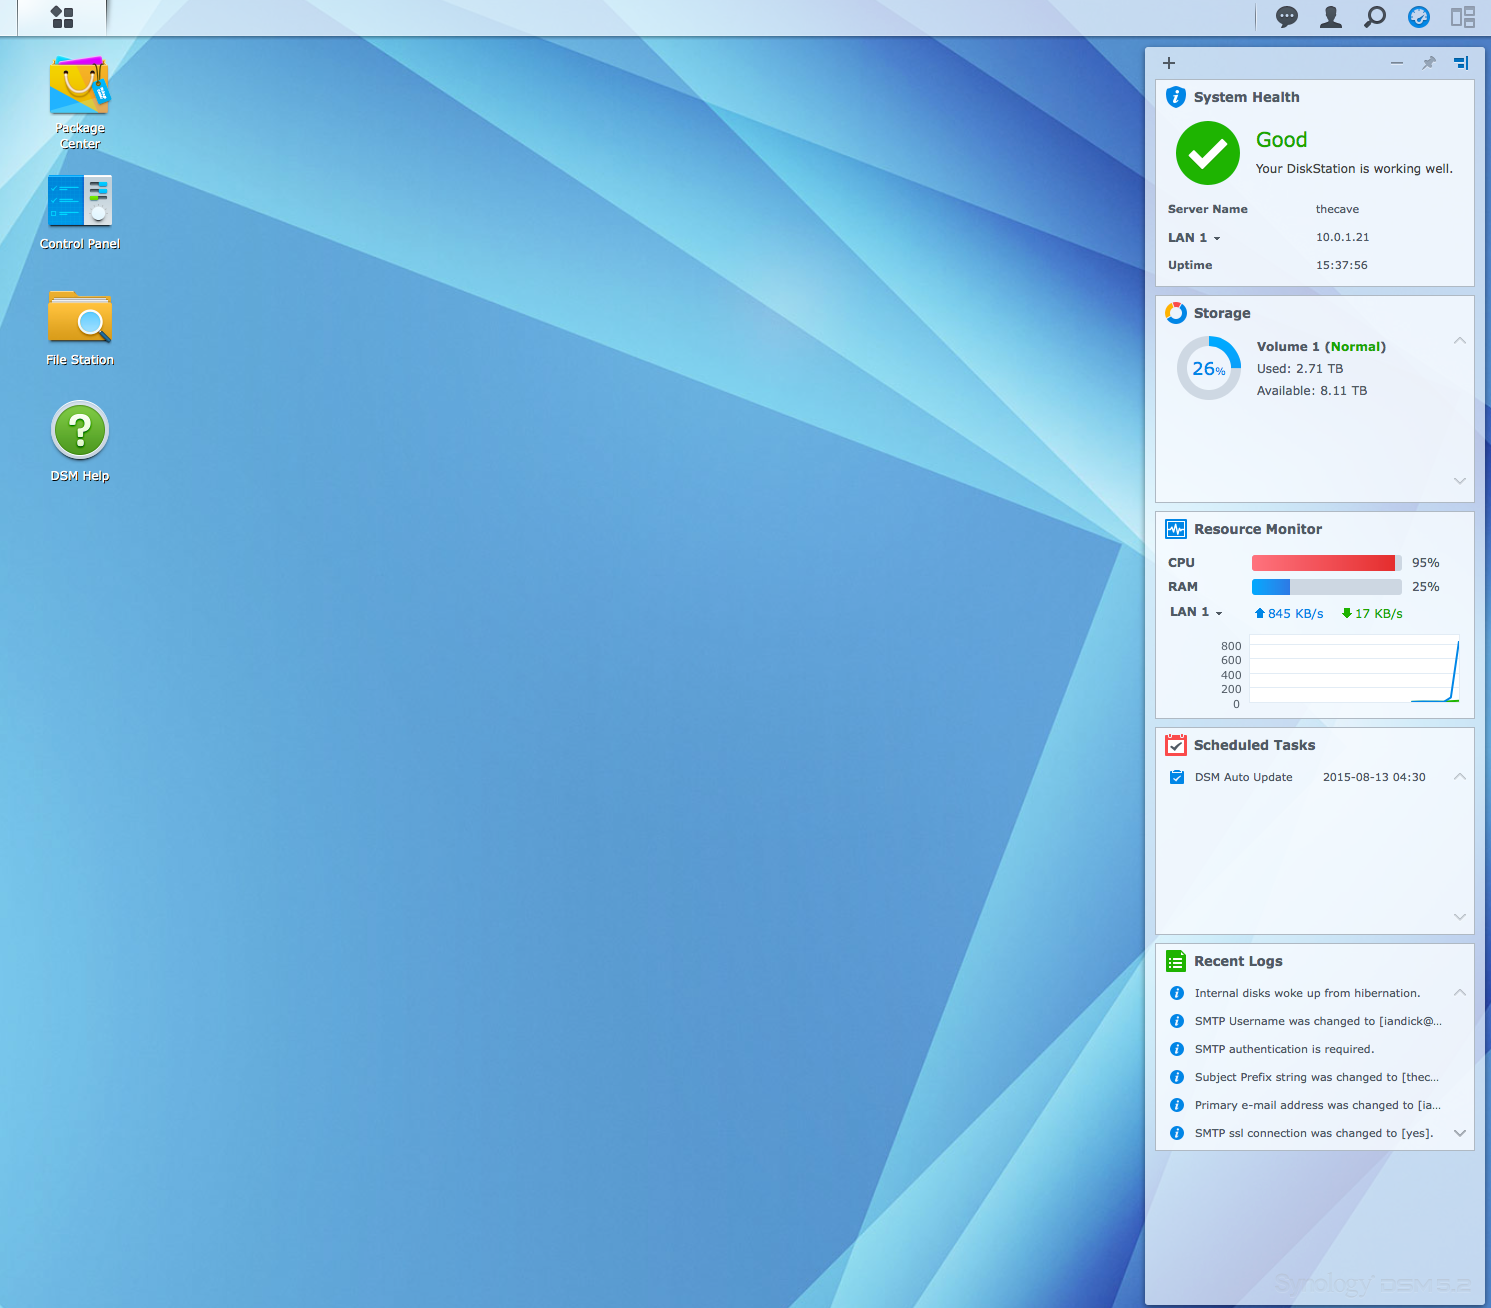
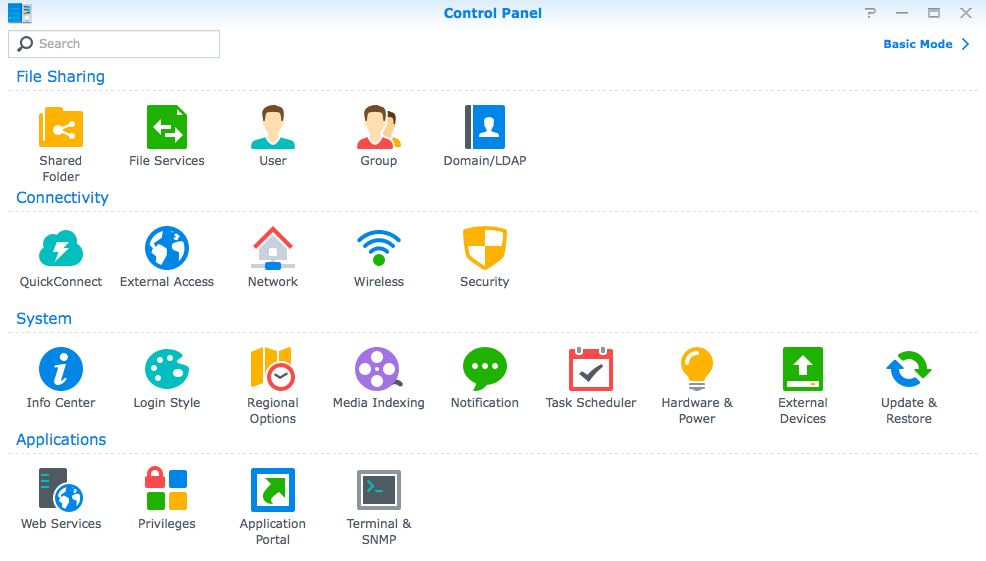
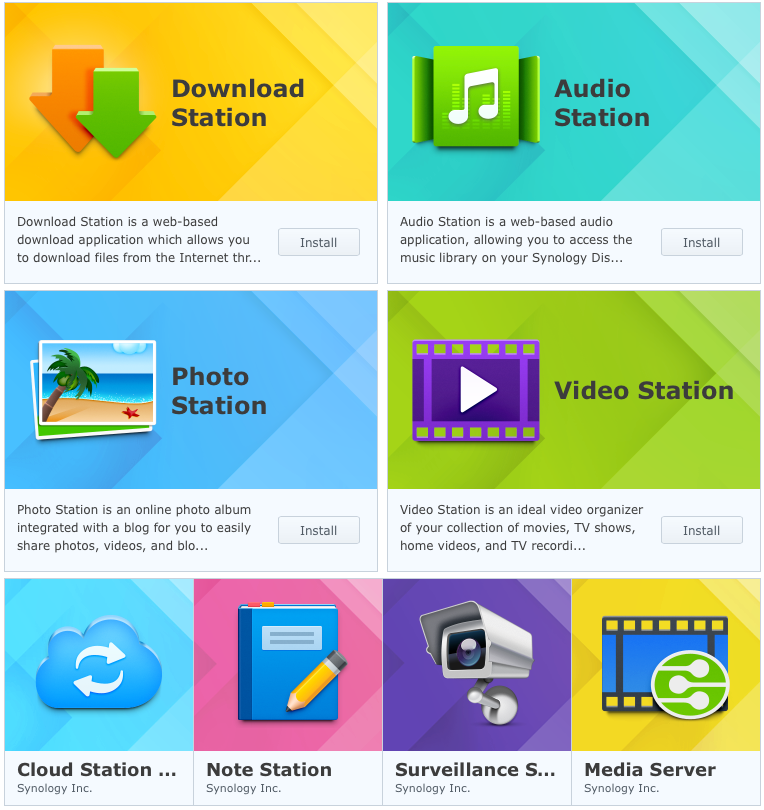
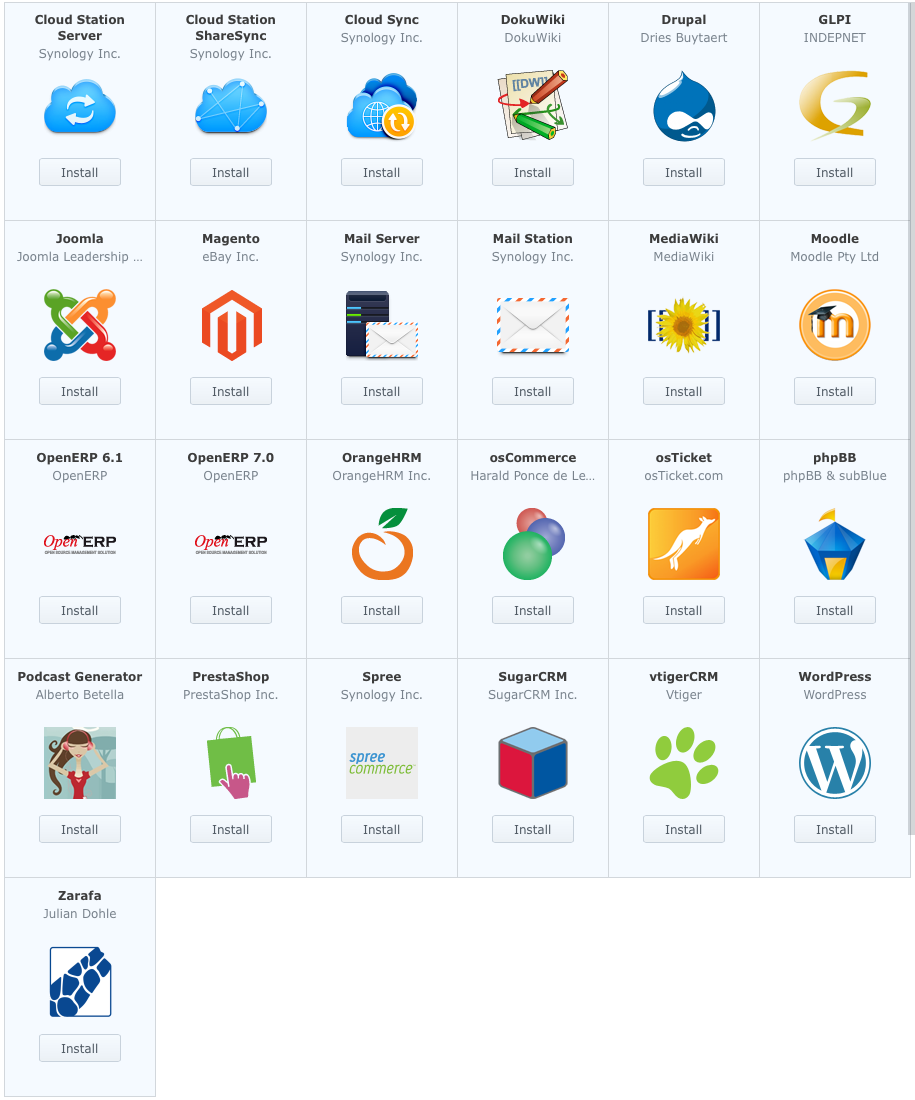
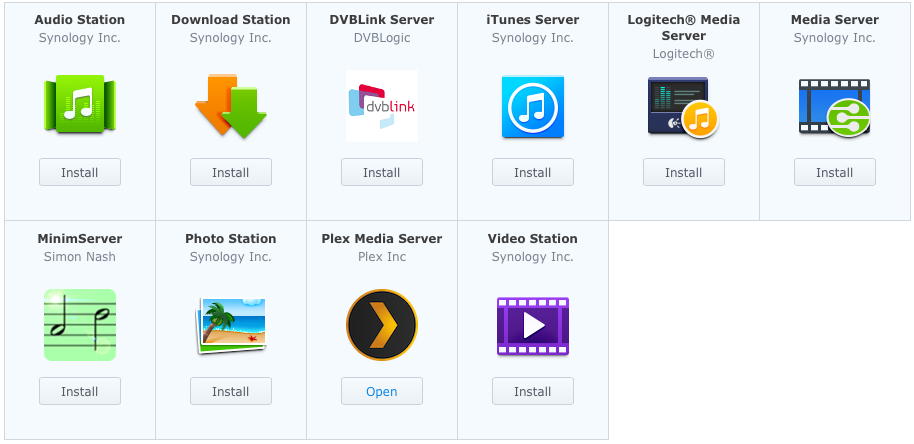
One of the advantages of Synology is DSM. It looks like an O/S when accessing from a browser and has a lot of capability out of the box. You can easily see status of your NAS, setup e-mail or text alerts for significant system events, create volumes, folders and shares and manage user access amongst many other features. Via DSM you can also install a number of Synology applications that have companion app’s for iOS and Android. There are obvious ones like Download Station to help manage downloads, Audio Station for music, Photo Station for images and Video Station for movies. Unexpected apps are Note Station – basically Evernote lite but you manage the data and Surveillance Station – hook in to a home alarm system and the NAS can manage

synology packages

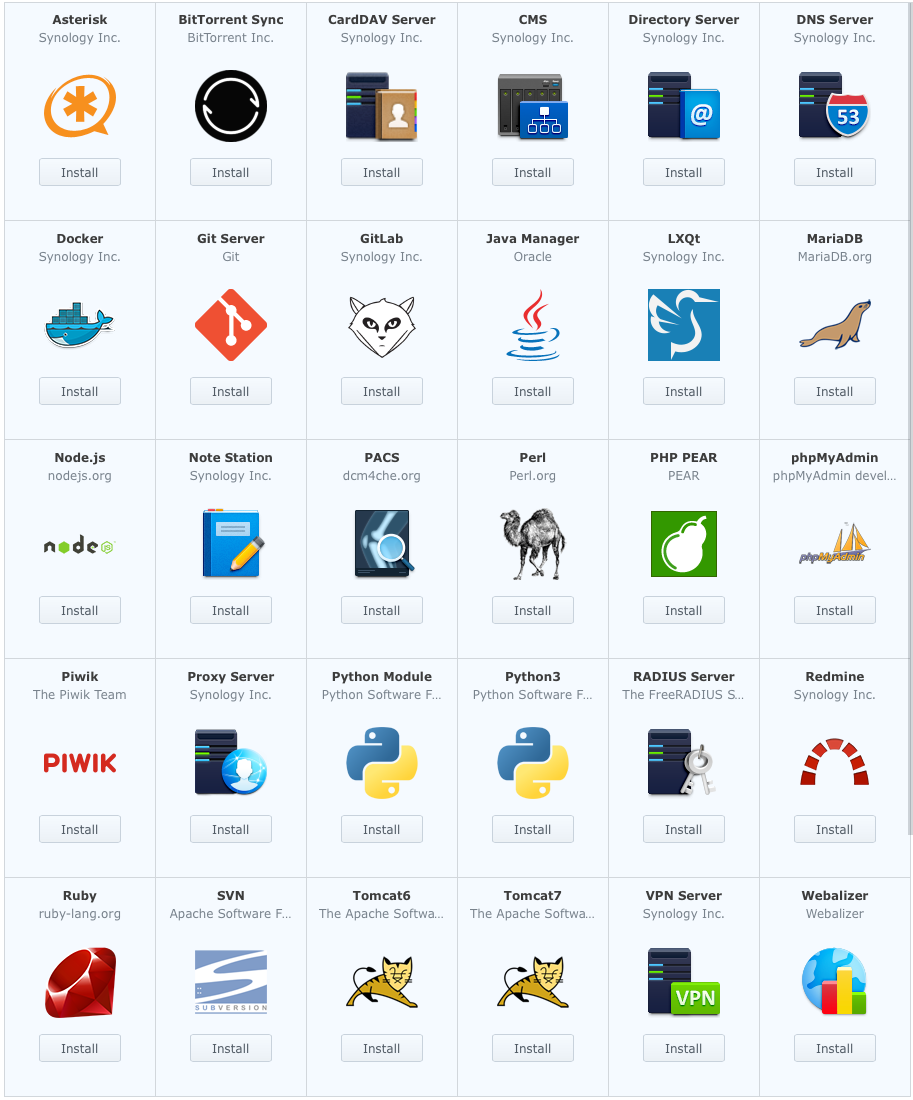
Some of the app’s are simple but a couple are really good including Photo Station and Video Station which is basically Plex Lite. While there is much to be gained from these app’s the real power comes via the third party app’s that Synology make available via DSM. There are some app’s for syncing to and from third party cloud providers and media options including iTunes and Plex. Depending on your needs and broadband connection you could self host WordPress, Git, Wiki and also e-mail via the supplied packages. There’s a lot that the NAS can do but be careful as the more you add, the more chance the NAS will be always on and you will start to use up resources as the 415+ only has 2GB of RAM.

backup

business

media

utilities

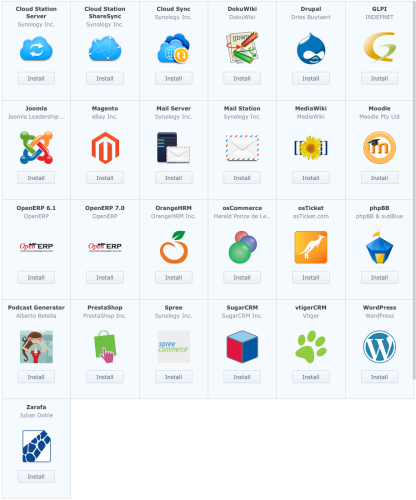
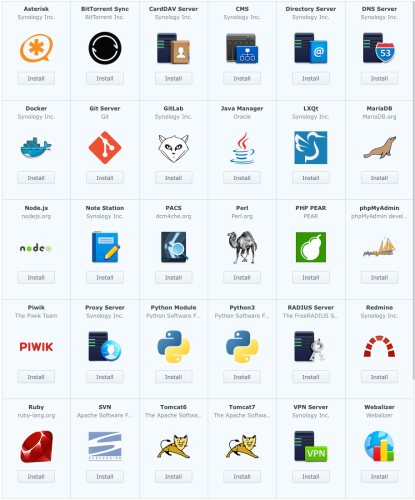
These are just the app’s supplied by default by Synology and not always the latest version, more on that later. However you can add in packages from third parties. One of the better resources is SynoCommunity which allows you to install Python and a variety of newsgroup and torrent managers amongst other things. You can add packages in manually or by adding new package sources. So for SynoCommunity login to your NAS and go to Main Menu, Package Centre, Settings and set “Trust Level” to “Synology Inc. and trusted publishers”. Then in the Package Sources tab, click Add, type “SynoCommunity” for the Name and “http://packages.synocommunity.com/” as Location and then press OK. Now when you visit Package Centre you will see a Community tab where you can browse and install packages from SynoCommunity. A comprehensive list of package sources can be found on the Synology Forums.

Before installing any packages I assigned an IP address to the NAS so I could guarantee it’s address going forward. There’s a variety of ways to assign an address either within the NAS itself or via a DHCP reservation within your router. I chose the later using the MAC address of the NAS to guarantee it always receives the same IP address.

Copying Data
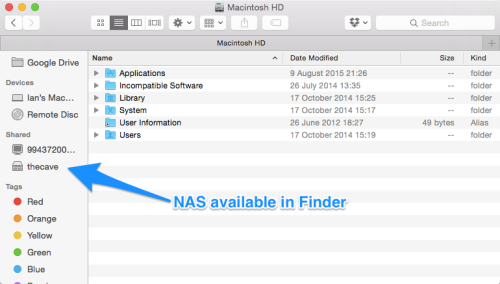
With the setup complete it was onto copying the data from the firewire drives and iMac to the NAS. I created a movies folder share on the NAS ensuring that guests do not have access and started off the copy. Accessing the NAS on the Mac is easy if you turn on “Enable Mac File Service” on the NAS. Once this is done it will appear under Shared. If not then in Finder click the Go menu and select Connect to Server.

Macintosh_HD

It was early Saturday and I was out for the day but 8 hours later and it was still copying data. It was only 1.5TB so it shouldn’t have taken that long. Next was TV shows and again performance was awful. I messed around for an hour looking for reasons why the NAS was so slow but it turns out the issue was on the Mac side. I was using Path Finder on the Mac and copying to the NAS using Path Finder induced terrible performance. Swapped to Finder and it flew so it didn’t take too long to get the rest of the data onto the NAS.

Photo’s
I’ve moved my photo’s to the NAS but left the Lightroom library on the iMac. On launching Lightroom the library complains that the photo’s are missing but you just point to the folders (right click on folder and select “Find Missing Folder”) on the NAS and the library updates without issue. Lightroom handles a NAS well. If it’s off for whatever reason it doesn’t remove photo’s from the library, just states that the photo’s are offline.

I was a bit concerned that performance would be poor but it works really well. You can also move files/folders from within Lightroom itself which makes for a quicker workflow. In fact my future workflow will be to import and work on new photo’s on the iMac and when edits are complete then move to the NAS.

One thing I do have to sort is making better use of the various cloud photo options. Google Photo’s is very nice as is the new Photo’s service from Apple but I still pay for pro account at Flickr….and hardly put any photo’s or videos on it. This is something I need to sort over the coming months so I can have one place online that holds all my photo and video content.
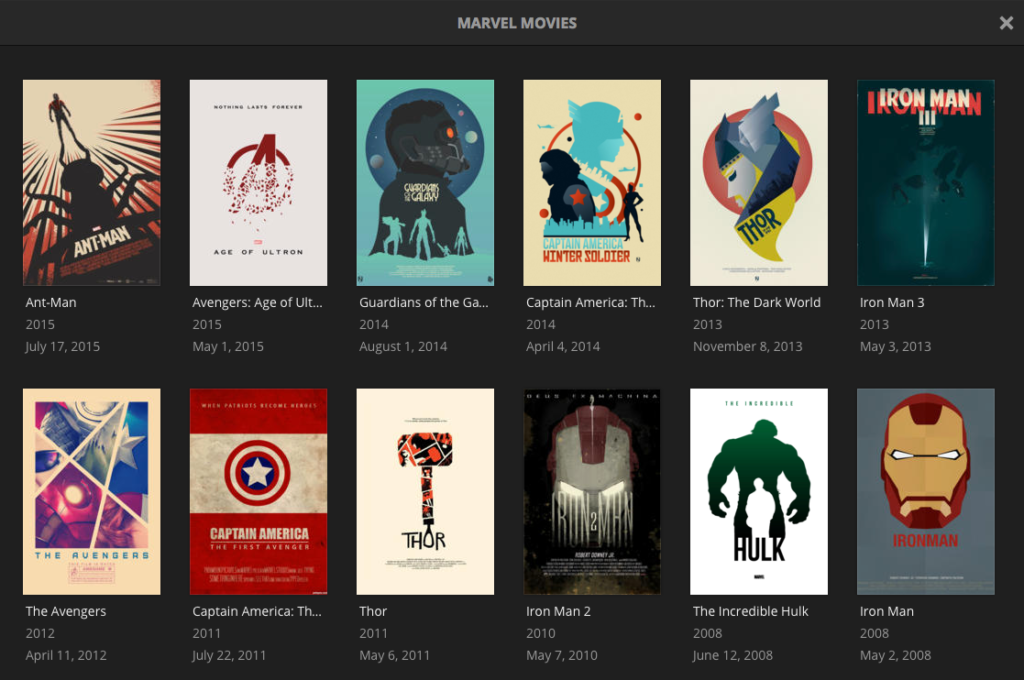
Plex
I love Plex and it’s my main media manager allowing me to access films, tv and music anywhere. One of the main decisions when it came to the NAS was whether to buy one that would enable me to do 1080p transcoding which needs a meaty processor and a lot of RAM. I decided it wasn’t required as for mobile usage I very rarely access Plex from afar and locally my Plex clients can all now playback original content so no need for transcoding. I still had a niggle that the NAS would struggle though.

Although Plex is available via the package manager it’s best to install manually as Synology doesn’t do a good job in making the most up to date packages available. There’s an excellent support article from Plex that takes you through the installation steps but it’s really straightforward. Add Plex as a trusted publisher, download the Plex package and then install it on the NAS by doing a manual install. It takes a couple of minutes and before you know it you’ll have a Plex installation up and running.

Everything is configured via a web interface for Plex and the Synology package supports all the usual Plex options including Plex Pass. Once up and running you point Plex to your media libraries on the NAS and it indexes it adding posters, film info etc. For my modest library the indexing was pretty speedy and before long I had my Plex library up and running again but this time on the NAS.

Playback performance has been excellent which is a relief as it was my main concern. I rely on a wired network for playback on TV’s around the house as wireless just doesn’t cut it but I still had a niggle that the NAS wouldn’t be powerful enough but it is. Remote access to the library also works well. I can be anywhere in the world and access any media of my choosing. Plex makes this process really easy but I have found one issue – hibernation. With Plex running the NAS would fire up it’s disks every 20-30 mins, basically meaning it was always on. Without Plex it would sit in standby and fire up only when asked. Mmm.

I disabled most of the settings in Plex for auto updating metadata, library refreshes etc and this make zero difference. I then stumbled on a post on the Plex forums – Plex preventing hibernation once again. I enabled SSH, logged in to the NAS, found the offending file and dusted of the vi skills to comment out the offending line of code. Bingo. Plex now runs and is available from all clients at any time but the disks go into hibernation, only starting up when required. If I know I’m not using the NAS I’ll have it switched off but over weekends when I’m dipping in and out of data I want it to hibernate properly so I’m pleased to get to the bottom of that issue…and hopefully the Plex team will deliver a proper update sometime soon.

Music
I’m lost with this at the moment. I blamed Apple Music for the move to a NAS but it was just one of a variety of reasons. I’ve got a fairly large library of music and one thing I won’t be doing is deleting it from any computer and relying on a cloud version only. However both Apple and Google have copies of my music library so I can get to it from anywhere with ease….but I don’t trust the hosts. Apple Music has dabbled with my local library changing some album art, metadata and also mismatching titles. If this was cloud only I’d be frustrated. However this is with my local content – don’t fuck around with my content Apple!

So I will undoubtedly put all the music on the NAS but not sure if I will use the Synology iTunes server package, rely on Plex or look to something different. I’ve also got a fairly large collection of lossless that I don’t put to good use. Decisions decisions.

Backups
For backing up the Mac I’ve always relied on SuperDuper! rather than Time Machine and moving to a NAS does give me some options that I didn’t have before. SuperDuper! was used to create a bootable image, something you can’t do with a NAS. However following this guide I’ve got a regular backup to the NAS via SuperDuper! and it all happens automagically. I’ve accessed the image file created and all is well but I plan to keep my eye on it as it is a different method than I’m used to and I don’t want to trust it and find it has issues when I actually need it.

For backing up the NAS I’ll be looking at CrashPlan by using this user maintained CrashPlan package. The other area still to investigate is using the NAS as a Dropbox copy so I always have local access to that data rather than it being solely in the cloud.

Conclusion
I had no idea when I started this post that I’d end up rambling for so long. One thing is clear since I started this and also got the NAS – I’m really happy with the Synology 415+ and I’m probably using only 5% of what it can do but that 5% is working really well. Sleeping the NAS can be a pain though and the more I add to the NAS the more frustrating I can see this being.

I also feel in a much better place with my data in that the primary source is local to me, has redundancy built in and will soon be on various cloud services to reduce risk even further. It’s not the cheapest solution but I don’t want to lose my data and still don’t have enough trust in going cloud only. With that I’ll finish. Thanks for getting this far and I hope it was helpful!

Podcasting

Podcasting has been getting some press recently, more so than normal. I first noticed it back in September when The Washington Post declared that podcasts are back and making money. I never knew they had left and the making money part wasn’t much of a surprise either. Roll forward a few months and we seem to be in the middle of a popular podcast storm.

Top Shelf from The Verge did a great video on why podcasts are so popular just now. Serial Podcast is one of the biggest podcasts in years and has succeeded in reaching new audiences. It’s also set the record for fastest podcast to 5 million downloads. It seems more and more people are not only listening to podcasts but actually producing their own. That’s not much of a surprise either as it’s fairly easy to record and publish your own podcast. I know as I’ve been podcasting since 2009.

What was more surprising was the posts recently from a few of the more notable tech podcasters and also the heat it generated on twitter. Firstly Jason Snell posted on not being intimidated to do a podcast. A lot of what Jason wrote resonated with me but unfortunately there was some heat on twitter from a few sources on technology and what gear you should be using. A sort of follow up from Marco Arment tried to move the debate on so that it focussed on the listener. I agreed with some of his points but felt it strayed into gadget snobbery again.

So after 230 episodes of DigitalOutbox what have I learned:

  • To get started you don’t need much, especially if you aren’t sure if podcasting is for you and you want to give it a go.
  • Me and Shak started with a headset with mic built in. Quality wasn’t great but it got us off and running. Use an iPhone headset as it’s good enough to get you going.
  • If you are enjoying podcasting and want to keep going after a few episodes then invest in a better mic. I use a Rode Podcaster, Chris uses a Blue Yeti and I think our audio quality is good. You can go a lot higher quality if you want but I do think it’s diminishing returns. To keep it easier, both of these are USB mic’s.
  • Get a decent set of headphones that don’t leak audio – if they do then your mic, especially the better quality ones, will pick up on the audio from your headphones.
  • Each podcaster should record audio at their end. Recording Skype and using that for the audio source causes more issues than the hardware in my opinion. Share the audio with the editor over Dropbox. Nice and easy.
  • If you’ve got a Mac then use Garageband for editing, at least to get started. Audacity is another option.
  • Editing should focus on getting everyone’s levels even and also cutting out mistakes, drop outs, phone calls – whatever gets in the way of the listener enjoying your Podcast.
  • You can also edit to remove silence, mmmm’s, eh’s and all the other little annoyances. I’ve done this a few times but must admit that I find it a bit of a chore to do so don’t often bother. It’s not a show stopper but it will be for the better if you remove them.
  • Put chapters into your podcasts. I wish more podcasters would do this so you can skip a topic that isn’t interesting you but very few do. A shame.
  • You don’t need to spend loads on hosting your podcasts if you are doing audio only. I use Dreamhost and the speeds are good enough for our podcast and there are no limits on bandwidth.
  • A 30-40 minute audio podcast will take around 2-4 hours each week to record, edit and publish not including any research time you need. A video podcast will require a lot more. Do not underestimate the step up in bandwidth, production and hosting a video podcast requires.
  • Something I’ve not done too much off is room treatment but you do want a quiet room and ideally with not too many hard surfaces around. The better the audio quality the less you need to to edit so try and make sure you don’t pick up phones, clocks and other voices while you are recording.
  • Enjoy it.

Dan Benjamin, founder of the 5by5 network has put together a great site on podcast hardware and software recommendations at The Podcast Method. Well worth a read. He also has published a really useful video on mic technique which features some great tips.

The main thing to remember is not to let the gear or the software become a barrier to entry. Give it a go and if you enjoy it you can invest at a later date once you know if it’s for you.

Now…about podcasts making money. Any tips?

Windows 10

Microsoft surprised everyone by announcing a new version of Windows and calling it Windows 10. There were lots of rumours of a new version but none predicted that name. Why 10? To get away from 8, to make it sound really different, to align with Mac OS X? One rumour yesterday linked it to Windows 95 and 98.

By4GyZdCUAAWuL3

Windows 10 won’t be out until late 2015 but there is a technical preview available and credit to Microsoft as they’ve made it available as a downloadable iso image so it’s easy to install as a virtual machine via VirtualBox.

Windows 10
Windows 10

On first run Windows 10 shows you a desktop that looks familiar to all Windows users that bizarrely was missing from Windows 8. A desktop with a start menu that you can launch app’s from, search from and easily power down your Windows device. In fact it looks like Windows 7 with a new theme apart from one thing – tiles in the start menu. There’s a few other tweaks here and there but when you see it running you’ve got to wonder why Microsoft just didn’t update Windows 8 to have this view. That’s another year for Windows 8 users to suffer from some fundamental usability issues. But don’t worry, Windows 10 will fix it.

Task switcher in WIndows 10. Expose?

A couple of other changes. Firstly there’s a task switcher that brings up a view not unlike Mac’s Exposé and is pretty useful when you have lot’s of app’s and windows active. The other is search. This feels like Mac’s Spotlight or tools like Alfred or Launchbar in that when you search for something it will search against app’s, documents and internet sites. Handy and seemed to work well when testing this morning.

Search in Windows 10

That’s about it so far from my brief play. I had to launch a command prompt just so I could confirm that cut, copy and paste finally work. Such a small change yet it got mention at the Windows 10 soft launch this week. Weird. Microsoft have a lot more to show over the coming months but the emphasis so far on enterprise is almost a plea. Don’t leave us, we know where we went wrong. Windows 10 is ambitious in that it’s planned to be one platform across all of Microsofts devices – mobile, servers, desktops, laptops, tablets, large surface devices and Xbox One. I fear compromise again which is at the root of many of the problems in Windows 8 but Windows 10 looks to be a good start on desktops and laptops at least.

NomadKey Review

Charging cables aren’t usually the most interesting of topics and not something I think much about apart from ensuring I have cables for my devices at work, home and when I travel. That basically means a lightning cable and a micro USB cable to cover the many devices that I use day to day.

I was contacted by Nomad and asked if I was interested in trying a NomadKey and passing on my thoughts via this site. A few weeks ago I received a Lightning and micro-USB NomadKey and since then I’ve been using them to charge my iOS devices and my work phone and mifi device.

Lightning NomadKey
Lightning NomadKey

The NomadKey is a reworked version of the Nomad ChargeKey that launched last year. The main feature of the NomadKey is it’s size and flexibility. Slightly larger than a standard house key it’s designed to live on your key ring so no matter where you are, if you have your keys you can charge your device…well, as long as there is a USB socket nearby.

The NomadKey features a slim USB connector at one end and a lightning or micro-USB connector at the other. Both ends are made of a hard plastic and the middle is a flexible rubber which covers the cable connecting both ends. This allows the NomadKey to twist and allow you to charge your device in some pretty awkward places. While fine for phones and small devices it’s not practical for things like an iPad. The chargers are really light, so much so you won’t notice any additional weight on your key ring or if you decide to carry them in a travel or office bag.

In use I’ve found the NomadKey to be fast and reliable. For iOS devices it’s not only a charge cable but sync’s as well and is certified by Apple. I’ve seen no difference in charge or sync times between an official Apple cable and the NomadKey. It also carries enough current to charge an iPad.

Flexible NomadKey
Flexible NomadKey

Although reliable over the last three weeks I do have a couple of niggles. Firstly the USB and lightning connectors are uncovered. As the premise of the NomadKey is for the charger to live alongside your keys I do worry that over time the connectors will pick up dings and scratches. The more durable plastic that hooks onto your key ring does look robust but again, over time will it become chewed up?

Finally is the question of value. The NomadKey costs $29 with free shipping to the UK which feels a little steep. A 1m lightning cable from Apple is £15 and I think the NomadKey would be more appealing to users if they managed to undercut Apple even slightly.

Despite the niggles I loved the NomadKey cables and would recommend them to anyone looking at picking up a new charge cable or who tend to misplace or forget their current chargers. It’s an excellent day to day charger and especially useful for the frequent traveller. Nomad are also bringing out a new product called the NomadClip which is a portable charging cable in the shape of a carabiner and something I’m far more interested in.

If you like the look of the NomadKey or any of their other products then you can pre-order them now and for a limited time you get 25% off if you use the code “LIVESIMPLE”.

Goodbye Three, Hello EE

A month ago I finally switched away from Three after a couple of years dealing with a number of issues with them. Mostly due to price and unlimited data I stuck by Three but at work I invariably would have limited data or no data connection at all.

The final straw was at the end of March when I couldn’t even make or receive calls at work. I’d leave the office and get a text saying I had a voice message. No missed call, no text or call at the time…hours after a call I’d get notified that I’d got a message. This wasn’t just one day and went on for a couple of weeks. As per the last couple of times I contacted Three’s engineers, no faults in the area and it must be my phone despite others in the office on Three having the same problems. I’d also call voicemail and get disconnected after 20 seconds – constantly. So frustrating.

So after waiting and getting 4G in Glasgow on Three it was time to move on and I went for EE as they had tweaked there prices to make it slightly more competitive and their speeds at my workplace were excellent. Monthly contract, 4GB of 4G data for £23. Unlimited everything else so not too bad.

The initial on boarding with EE was dreadful. I phoned up to see if there were any deals and got a price higher than the website. Mentioned the website price and was told to sign up there then. Charming. The signup on the website was awful. Multiple attempts to try and complete the form which kept resetting back to the start of the process. After 30 mins I’d finally got the application submitted to be told that I’d get a phone call from EE so they can check the order before it can be accepted – whats the point of that?

The phone call was quick and a couple of days later I had my new sim. 4G speeds in Glasgow are excellent and I’ve had no issues at all with connectivity over the last month.

4G speeds at work
4G speeds at work

One issue I did have was the initial transfer of the mobile number. It took three days instead of one and I kept getting text messages welcoming me to EE, then T-Mobile then finally to EE. Hey ho, it all worked in the end.

The last niggle was how much data would I use? The first month saw me use 3.2GB out of 4GB. So not too bad, under my limit although that included a week off work which saw me using less data as I was at home more.

One unexpected positive was a sharp increase in battery life. I’d typically come home from work with around 10-30% battery life and I’d put that down to iOS 7 and my usage of apps during the day. However the shift to EE has seen battery life of 40-70% when I get home. I’m assuming that the iPhone is wasting a lot of battery hunting for data while I was with Three that it isn’t now doing with EE.

So far, so good. Great 4G speeds, a reliable data connection, app’s are snappy on 4G compared to 3G and I can even make phone calls too. Bonus. I really do wish I’d moved from Three months ago but stubbornly I expected the issues to be resolved. They weren’t. If you are with a mobile company and having issues then change providers. Life’s too short.

Todoist

I lasted 4 months. Omnifocus was too rich for my needs and Wunderlist not enough. I switched to Reminders as it synced between iOS and Mac and app’s like Fantastical displayed the todo’s alongside my calendar. It was working well apart from one thing – iCloud. Last weekend saw my Reminders yet again get out of sync. iPhone different to iPad and different to the Mac. So frustrating and coupled with some annoying usability issues it was time to look elsewhere again. After looking at the usual options I plumped for Todoist and one week later it’s working out well.

Todoist - Karma
Todoist – Karma
The most attractive feature of Todoist is that they have clients on every platform. Every doesn’t just mean iOS, Android and Mac. Web, Windows, Outlook – in total there are 13 different platforms and devices from where you can manage your to-do’s. Thankfully the sync works quickly and I’ve had no issues with entering, updating and closing off to-do’s across all platforms.

Unlike so many applications at work, Todoist works well on Windows so I can keep on top of things no matter where I am and what device I’m using. On all platforms Todoist provides a clean interface and a quick way of entering to-do’s. Date support is great and also understands plain english so entering a recurring task is as easy as writing ‘every 7 days starting next wed’. You can also write ‘due date after 6 months starting 15 March’ which means the to-do will recur not every 6 months from the March 15th but 6 months from when you completed the task that was scheduled on the 15th. A small detail but one I really like.

Karma is Todoist’s way of showing how productive you are being. A bit gimmicky but coupled with colours against projects it provides a nice overview of what you complete and when. Labels and filters across all platforms also allows you to implement a fairly comprehensive GTD workflow if you are that way inclined. Projects can be nested as well as tasks so you can break down a to-do into as fine a detail as you want.

Todoist on iOS
Todoist on iOS

I particularly like the iOS interface. Easy to add/edit a to-do with quick access to labels, priorities and reminders. Making a change to the date brings up some common options too – switch to tomorrow, next week or pick another date. Very nice and Android is much the same, just not as pretty.

While Todoist is free and allows you to sync across all clients there is a paid element which add’s Reminders, Notes and Labels & Filters for $29 a year. After a couple of days use I paid for the year to get the three features and it does take the flexibility of Todoist to another level. Reminders can be received via e-mail, SMS or push notifications and have worked flawlessly over the last few days. As mentioned, Labels and Filters allows you to build a sophisticated GTD workflow if you want to…or just add more relevant filtering. Again the filters are available across all platforms making it easy to stay on top of tasks. Multiple Notes can be stored against a to-do which is nice for tracking progress on a task and you can also attach files to the to-do.

One aspect I won’t use is collaboration with others on projects and to-do’s but overall I couldn’t be happier with Todoist. I’ve finally found a to-do manager that has flexibility coupled with speed without being overly complex.

2013 was a lost year for tech

As I read this from Christopher Mims I kept thinking that somehow he has lost out on an exclusive over the last 12 months. Or someone stole his toys. To say:

All in, 2013 was an embarrassment for the entire tech industry and the engine that powers it—Silicon Valley.

is just crazy talk. Read John Gruber’s or Om Malik’s response for a more balanced view of what the last 12 months has meant.

2013 was a lost year for tech journalism would be far more accurate.